Friday, February 29, 2008

New Duckling and other updates.


I have designed a new duckling for Easter, I think he is a cutie with his little wings. It stands about 5" tall. In order for him to be able to stand without any support I put a fairly heavy gauge of wire in his legs. His little ducky feet are very cute! I will paint and antique him with my usual process. I may make him in a larger size in the future.
I am making 3 more Victorian style bunnies, the ones that are standing up on their hind legs. I have made them in 3 sizes ranging from approximately 8" - 16" The middle sized one will have his head slightly turned.
The little Uncle Sam Sawdust Dolls are finished and will be going up for sale on ebay this weekend. I am selling them both together in a set. They are about 7 1/2" tall.

Sunday, February 24, 2008

The Rabbit Pull Toy and Sawdust Sisters


Wow - what a week.

I managed to finish up the rabbit pull toy, I hope someone else likes him as much as I do. He will be up for sale on ebay later this evening. I stained the wheels and axles with walnut stain they match the bunny nicely. The pull chord I made out of hemp, I braided it and added a wooden bead on the end. It looks pretty authentic, like a vintage toy.

I went ahead and aged the sawdust sisters even more than they were.
Then I made cute little muslin dresses for them and crudely embroidered flowers around the skirt bottoms, then stained them with coffee. I sanded the dresses - yep, took out my frustrations on these, they have some thin places and some places that I sanded all the way through and made little holes. I thought about putting patches on them but decided that would make the dresses look too busy since I had embroidered them.

I gave each sister a aged brass heart and tied it to the bodice of their dresses. Instead of making the tiny hand stitched button holes that I usually make I used rusting safety pins to close up their dresses in the back. They are very sweet, very primitive looking.

The Sawdust Sisters will be listed on ebay later tonight. I do hope they find a good home with someone to love them.

I will be working on the things I didn't get finished this week - plus a few new things. The ideas are endless.

Wednesday, February 20, 2008

Mid-Week Update


Here is my update photo's. The Uncle Sam sawdust doll needs more painting, but I think he will be cute when finished.

The Uncle Sam and Yankee Doodle primitive doll set are getting there. The faces are painted now and they have been sanded lightly. Next I will apply a coat of stain to antique them. They are both jointed dolls, and will be button jointed at the knees and shoulders. I have made them so that Yankee doodle will be looking up at Uncle Sam and Uncle Sam will be looking slightly down towards the Yankee Doodle Boy.

The little sawdust doll sisters are turning out well. I stuffed them lightly with sawdust so that they look as though they have been around awhile and are a bit floppy.

The rabbit pull toy has a layer of gesso and 3 layers of paint so far.

That's what I have gotten done on them so far this week. There are so many idea's that go through my mind that I keep a list of dolls and toys that I want to make. The list just keeps growing, I don't think I will ever run out of ideas.

Also I want to say thanks to all of you are reading this blog and looking at my ebay auctions. Your support and kind words are very appreciated.

Sunday, February 17, 2008

What Am I Working On This Week


This week I have several dolls going at once, which isn't unusual for me. There is a Uncle Sam and Yankee Doodle Boy set, a old fashioned Bunny pull toy, 2 little old fashioned sawdust filled dolls that were inspired by a combination of the old printed panel dolls and china dolls, and 2 little Uncle Sam sawdust filled dolls.

The Uncle Sam Yankee Doodle set is made of muslin and will be painted dolls with jointed shoulders and knees. Their facial features will be needle sculpted. So far they are looking very good. Yankee Doodle was around for some time before Uncle Sam came to be - I just thought maybe it was time that they meant.

The old fashioned bunny pull toy is being made of osenburg fabric. It will be painted and aged to look like an antique toy. I will give him wooden axles and wheels.

The sawdust filled dolls will be jointed at the shoulders. I think I will paint their underclothes on them and then dress them in simple calico prints or some sort of cotton material that has been aged.

The Uncle Sam sawdust filled dolls will be all painted and aged.

I have a very busy week this week - I hope I can get them all done by next Sunday.

And that catches us up for now, I will up date this at the end of week.

Thank You for peeking in on the Doll*Shoppe.

Don't forget to check out my eBay auctions. Just click on the link below:

Victorian Bunny - A Primitive Bunny Doll


This little bunny is a cutie - he was inspired by the bunny toys that were available during the Victorian era, He is about 11 3/4" tall, including his ears, his feet are a bit smaller than most modern bunnies.

He started off as just a piece of muslin cloth. I made a pattern and cut him out, sewed him up, needle sculpted his face and brought him to life with a bit of paint.

He was painted in layers and sanded between each layer, This gives him a softer almost leather like feel. His tummy and tail are antique white.

I chose darker brown colors for this little bunny, and jointed him with antiqued brass colored metal buttons.

He has a very old fashioned air about him, he carries a little basket that I crocheted out of hemp. I had thought of making him a back pack basket, but he is so small that I think the little hemp basket fits him perfectly.

This bunny is for sale on eBay, the auction end Sunday February the 24th.
Here is a link if you would like to see him there:

OLD FASHIONED BUNNY * PRIMITIVE DOLL * FOLK ART


Mama Bunny and Her Babies. Part II - The FInished Dolls


I am so happy with these Bunnies. The Mama looks so proud holding her little ones.
The asleep baby looks so calm and secure in his mama's arms his brother looks as though he is squirming to get away.

I decided to use wooden buttons for the joints. They blend well with the overall vintage look of these dolls.

Mama Bunny cannot stand by herself because she is up on her toes. She can stand propped up against something or in her stand that I customized just for her.

I put a heavy wire in her ears to keep them up-right and to make it so they can be posed.

This set really looks like a well loved toy of days gone by.

I am thinking, maybe I should make a few more of the baby bunnies to sell separately. I am sure there are those who collect the smaller primitive dolls and toys who would want them.


This set is listed on ebay the auction ends next Sunday, February 24th.
Here is a link to see them there:

MAMA BUNNY AND 2 BABIES * PRIMITIVE DOLL SET* FOLK ART


Mama Bunny and Her Babies. Part 1


Spring is getting closer, I can feel it - And that means bunnies. Easter bunnies, newborn spring baby bunnies - I have gone bunny crazy this last week.

I wanted to make something different, something unique but something that also looks as if it is a toy from out of the past. After some thought I got the idea of a Mama bunny and a couple of little ones, twins.

If you have ever know someone with twins or 2 little ones close in age you will know that if you hold one you have to hold the other one too. This Mama Bunny will definitely have her hands full. I wanted one baby bunny to be sleeping peacefully while the other one is wide awake.

I decided to make these out of muslin. I made a pattern for these and may make more of them in the future. Especially I may make more of the babies, they turned out so cute!

After cutting them out and getting the machine sewing out of the way I needle sculpted their faces. The ears are hand sewed on to the bunny heads separately and not sewn into a seam with the machine.

When all the sewing was completed I got to paint! YIPPEEEE - that's my favorite part! I started by giving them all a coat of acrylic gesso and sanding that down. Then I painted them one layer at a time with different shades of brown. I used antique white for their tummy's and tails, The inside of the ears are blushed with a fleshy pink color. I painted their noses, hand and foot pads in the same fleshy pink, however most of that was sanded away in the antiquing process, and just remnants of the pink color remain looking as though the paint has worn off over time. Due to the aging process that I have used on these dolls has resulted in the dolls have the feel of leather. This adds to the vintage appeal of these primitive bunny dolls.

Uncle Sam and His Eagle Part II - HE IS FINISHED!


Here he is in all his glory!

Uncle Sam and His Eagle.
I wanted the clothes to have an old vintage look to them so I sanded them to make them look like they have been around a few decades. I used tiny antique pearl shank buttons on his clothing. And Stained them tea and coffee.


His hat was made of cotton canvas and painted in layers like I had painted Uncle Sam himself.

He is a very tall 26" with his hat on. I made a stand to fit him and gave it a vintage look finish. It fits him quite well.

Uncle Sam was sold on eBay today and is going to go live in Saint Charles, Illinois.

Uncle Sam and His Eagle Part 1


At the same time I was making Froggy and Miss Mousy I was also making Uncle Sam and His Eagle.
I enjoy making patriotic dolls. I love my country very much and I hope that that shows in my creations.

Uncle Sam is a tall lean fellow, and If he has a pet I would bet it is an American Bald Eagle.

This Uncle Sam was made out of a heavier material - cotton canvas. I needle sculpted his nose and jointed his lower legs and shoulders.

He was painted with acrylic gesso, then several layers of paint - always sanding between layers to give him a nice supple feel - akin to leather.

I decided to give him mohair hair. I stitched it into his head and goatee.


I made the eagle in 4 separate pieces, and used the same painting process on him as I did on Uncle Sam.

Froggy Went A Courtin' Part III - THEY ARE FINISHED


I was/am very pleased with the way these two turned out. Miss Mousy perched so lady like upon Froggy's knee. Froggy's long legs and arms with big feet and hands add so much character to the ol' boy.

Both dolls have button joints at the shoulders and hips. Both have a light stain applied after the painting and sanding was finished to give them a beautiful aged vintage look. This painting process also gives the dolls a very leather-like feel.

Froggy and Miss Mousy sold today on e-Bay. Their new home will be in Loveland, Colorado.

I do hope their new owner enjoys having them around as much as I enjoyed creating them.

Froggy Went A Courtin' - Part II


After all the machine sewing is done and the needle sculpting completed the fun part begins.

First I give them a good coat of acrylic gesso. Then, after sanding it all down, I let my imagination take over (once again) And start painting!

I sand between each layer of paint and sometimes - depending on the look I want to achieve, there may be as many as 6 or seven coats of paint.

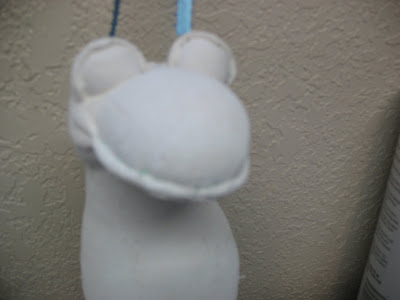
I wanted Froggy to have the markings of a real frog. Most frog dolls I have seen are all green or maybe 2 shades of green. I imagined Froggy was a leopard frog, there fore he would have to have spots!

Inspired By Froggy Went A Courtin'


One evening while playing the folk song Froggy Went A Courtin' on my banjo the funniest image of Froggy and Miss Mousy popped into my head.

I HAD to make those dolls based on the line "He took Miss Mousy on his knee and said Miss Mousy won't you marry me?" I could see the characters clearly in my mind and set to work to bring them into being.

The process I used to create them is unique in that it gives them a vintage look of the toys of yester year.

First it started as a sketch, I don't always sketch my character dolls first, but this time I did. Then I drew out a partial pattern and started cutting. I used osenburg fabric to make their bodies.
I sew my dolls on a old Singer Featherweight sewing machine. I have other newer machines but I really don't think my featherweight can be beat when it comes to making small tight seams.
The rest of the sewing is done by hand and there is usually some needle sculpting on my dolls too. In the case of Froggy there was a lot of needle sculpting.

The above pictures are of Miss Mousy in the making.